Wednesday, November 3, 2021

Today in the kitchen - बेसन की चक्की / Besan Burfi.


It's Diwali today and what better day to start making a favourite sweet from childhood that is so popular in Malwa(region where Betma/Indore are..). In Malwa, no festivity is complete without this sweet, whehter Diwali or Holi or Rakhee or birthdays or weddings. We grew up watching it being made at home but most interesting was when halwais make it during weddings or at some large gatherings to celebrate something or other. They will keep churning various mixtures in a huge cauldron/kadhai and after hours of hard work they will put that mixtures into a large flat plate for "chakki" to cool and we couldn't wait for it to cool down and in hushed tones will request the "maharaj"(master chef) for some and our innocence will often please them and they will give us a "dona"/leaf bowl (a standard use and throw bowl for large gatherings) full of it and we will hide somewhere and eat it..lest anyone notice and reprimand not just us but also the chef.

I tried Besan Laddu a couple of times earlier but Besan Chakki (burfi) was my yet another first.. 

I used a recipe provided by my brother Praveen ( and took some.tips from the youtube chanel "rashmi in the kitchen"), whom we respectfully call Dadabhai. He has been making it often and I was tempted earlier too but he never documented the recipe without which I found it difficult to prepare, since I cook new items only when I have instructions to follow, preferably a video. He had made it just 2 days back and using those instructions I began my preparation to make this mithai on the eve of diwali to celebrate.

Preparation time:

(sans final cooling 90-110 minutes).

kneading dough 10-15 minutes,

frying dumplings 10-15 minutes 

allowing dumplings to cool 10 minutes 

grinding the fried dumplings 10 minutes 

cooling of grounded mixture 10 minutes 

baking/mixing ghee in the grounded mixture 15 -20 minutes 

adding Mawa/condensed milk and cooking 10 minutes

chashni preparation 10 minutes 

mixing fried, grounded and "baked" mixture in chashni - 5 minutes 

pouring and allowing mixture to cool 1 hour (minimum).

-----

So first the ingadients to make a kilogram of Besan ki chakki..

Besan/gram flour - 500 gm

desi ghee/clarified butter -  250 gm 

crystal sugar - 250 gm(against recommended quantity of 600 gm)

condensed milk - 200 gm (recommended was 250 gm of mawa/khoya/milk solid).


Preparation:

To make dough.

pour 500 gm besan into a large bowl and add about 50 gm ghee and mix well. 


Now take small quantities of lukewarm water and keep kneading till you get a hard dough like this 


you need to be careful with the quantity of water else dough will become soft and will be useless for our task.

Now make small size balls and pressing them in your palm , make dumplings like this. I made 9 but realised 12 would have been better. Make a dent in the middle as shown for uniform heating/frying.


Now take the rest of the ghee, about 200 gm, in a kadhai that can take half of the dumplings. Add more ghee should the quantity is not sufficient for deep frying. Deep fry the dumplings and rotate them so that they get fried from all sides. Keep frying them till they get almost dark brown. This will take about 10 minutes for each lot on medium to low heat.


Once fried, switch off the flame before you take the next lot (should you want to fry all in one lot this is not required but then you will need a large kadhai and more ghee. Now allow the fried dumplings/muthias to cool, you may break them in piece when they are not very hot, in order for fast cooling. After they come to room temp, it may take about 10 minutes, using a grinder-mixture make a coarse powder and using a sieve remove the large pieces that have not been grounded properly. 


Put the kadhai with ghee that was used to deep fry dumplings, remove impurities from the ghee occurred during frying, once ghee is simmering hot mix the powdered fried besan and keep mixing for about 15 minutes or till you see its colour changing to darker shade of brown, on low heat. Now add about 250-300 gm of condense milk (if you are not using mawa) and keep mixing for another 10 minutes will the mixture is uniform. Flame should always be low to medium. Now switch off the flame and keep the mixture to cool to room temperature, thisake take 15 minutes.

In the meanwhile, let's prepare chasni (chashni). Take a large Patila/flat and deep cooking utensil (a kind of stock pot or Dutch oven). big enough to take the entire mixture. Pour 250 gm sugar in it and add rom temperature water just sufficient to dip the sugar. Now switch on the flame to low and you will find in about 10-12 minutes the mixture is boiling. Keep checking the consistency, we need chashni of one string( एक तार की चासनी), neither thick, nor soft. Once it reaches the desired consistency, mix a spoon of elaichi powder, quickly mix it well and grasially add the cooked mixture and keep mixing it well.

it is advised that you remove half a cup chashni and add it later. also advised is to add a spoon of sugar in chashni just before you start mixing the cooked mixture to get a coarse texture. 

Switch off the flame. Pour the contents into a large flat a about 2" deep plate. Add desiccated coconut ( nariyal ka boora) if you like the taste or decorate it will warq /silver edible foil ( I used neither) and allow the mixture to cool for a couple of hours ( if you are not.in a hurry). I kept it overnight. 

Mine came out a bit hard due to incorrect chashni thickness, low quantity of sugar may have a role in that.. but doesn't matter, I am happy with the outcome of my FIRST attempt at it.

Now cut them in small pieces and enjoy.


Friday, August 13, 2021

Book Review - "The Joy of Dreaming" By NR Panicker.

A couple of hours after I finished reading this autobiographical work of my former colleague and friend of last over three decades, I was listening to an HBR Ideacast (podcast) that had the Associate Dean of Yale School of Management, Kyle Jensen as guest, with the title " when entrepreneurs distort the truth". The title of the podcast said all about the discussion that were to follow. The expert who had vast experience on the subject was saying that every successful (and not successful too) entrepreneur lies his way out to build an enterprise.. he lies to investors to get funding, he lies to professionals who he wants to work with/for him, he lies to customers by selling them an untrue dream. Everyone he lies to also knows this but still work with him and help him build a "successful" enterprise, because they all feel that no matter what he says or does should he succeed, they all will achieve their goals.

In my opinion, Kyle didn't know NR Panicker. Having known him for a long time, I can assure you that Panicker may never have lied to push his way to become a successful entrepreneur. I am not sure had he done that whether he would have been even a bigger entrepreneur or had just remained a professional in a corporate as an employee and long retired by now. He may never have succeeded, as by lying he would have presented himself as someone that he was not and when you do that, you fail.. perhaps, only people who succeed with that 'feku' personality are politicians.

I first met Panicker when we both went to attend a colleague's wedding in Tambaram a suburb of Chennai in Dec 1988. We worked in different offices of HCL and the colleague who was getting married was working with me at the time and had worked earlier with Panicker. Having recently come in HCL fold from Bombay I took PanicKAR for any other Maharashtrian like GavasKAR, TendulKAR etc and struck a  conversation in Marathi.. he kept responding in mono syllables and in hmmms, haans. After about five minutes when I asked him something, this decent fellow who never wanted to hurt me, apologetically said, "I haven't understood a word of what you said" and said although his last name ends with KAR, he is Malayalee and to educate me, he further said "it's a common surname in Kerala, haven't you heard of the famous poet Panicker?" .. I hadn't.

We reamined friends till date. But having come to Delhi office soon afterwards. Our interactions in those days when Internet was not around, remained far and few. However, I kept myself abreast of his entrepreneurial journey. Reading his autobiography had shown a far deeper and sincere person who I knew will succeed in whatever he did, but never thought that he will reach to this level. Humility, that I have seen as most important andcommon factor in most successful entrepreneurs (with exceptions like Steve Jobs) never left him.

The book talks about the difficult and poverty stricken childhood that he had and normally such circumstances will consume a person and they will never be known outside their immediate neighborhood. How he fought that and managed to graduate with fanfare, not just in academics but also as a singer that could have been his alternate career and which helped him make his success in initial life easier. An engineering degree, a dare venturing in far flung Delhi and later to trouble-torn Nigeria and eventually starting on his own putting aside all doubts and risking a well established job, even going against the advice of legendary Shiv Nadar (the founder and then CEO) who initially got annoyed with his decision, but as a matter of chance supported him after he shown the unstoppable will to succeed.

The book is inspiring, actually Panicker is inspiring and the book makes an interesting dreamworld like story that's a testimony of humilty, hardwork, ambition, risk taking ability, ability to fast forget failures and quickly learn to bounce back. But a person who has a good heart often is taken advantage of and inspite of being cautious, falls into the same trap and loses all he builds.. but a bit of luck and all that is needed to succeed kept putting him back on track.

Now on his second innings, after losing his dream to some "fraudsters", whom the world calls agressive professionals, he is on a different path to help build another world, that often times people his age would give up and relax on the Kovalam beach or in Mahabalipur or even in Ibiza. 

Overall the book makes a great reading and pumps up your adrenaline and fills you to have an ambitious journey for yourself.. for youngsters in their first innings and for people his or my age in their second or third or whichever game you want to start playing. 

Saturday, August 7, 2021

Today in the kitchen - potato wedges. Aug 05, 2021

This simple and easy to cook all time snack is so dear to kids across the world that young ones often end up having this as the only thing for their meals. This one especially got popular after fast food companies set their foot across the country..nirula's to begin with followed by McD, KFC many of their clones and last of the big name that stepped in India, Burger King. But parents are always wary of this item since it is deep fried  and large quantities could upset their stomachs.

So here is a recipe that I followed, that doesn't add as much fat as the deep fried potato wedges of the restaurant. One could cook it in OTG or an airfrier and it retains the taste, I would say it tastes better than the deep fried version. Thanks to Borosil that provided a recipe book alongwith the OTG (oven, toaster and grill) that made my task easier.

The quantity is good for 2 people to relish that will be just enough to keep good space in your stomach for dinner if you are having it for tea time. Adjust it proportionately if you are more at home or if you invite people over tea time at your terrace or in the lawns( due to continuation of pandemic, I would highly recommend against entertaining people inside home).

Ingredients:
Potato - 4 medium size (300 gms)
Oil - 1 1/2 +1/2 tbsp ( recommend was 3 tbsp). I used olive oil that doesn't have any smell of its own.
Freshly ground pepper -1/2 tsp
Oregano - 1/2 tsp
Table salt - 1/2 tsp
Sesame seeds -1 tsp
Water - 1000 ml (for washing and soaking)
Icecubes - 2 cups

Process:
Peel potatoes and cut each of them in eight equal parts along length in the shape that you would like to eat.
Now wash them thoroughly, preferably in the drinking water instead of tap water. And place them in a bowl add water to the level they get dipped and add 2 cup (about 30) ice cubes. Put the bowl in the fridge for half an hour. Take out and drain water and dry the raw potato wedges on a paper towel or a clean cloth towel.

Take a bowl and add the spices, pepper, oregano, salt, sesame seeds and 1 1/2 tbsp (I prefer olive) oil. Mix all ingrediant well and add dried raw potato wedges, so that each wedge is covered with spices. Now take the baking tray (ensure it is clean, usually if you have not used the oven for sometime dust will settle on it, so wash it and dry). Usually you get one with OTGs, or pick any that you use for baking.. Borosil/Pyrex). Apply a little oil with brush and place wedges keeping uniform distance between them.

Preheat oven (set it to both upper and lower heating) at 230° C for 5 minutes. After 5 minutes place the tray with raw potato wedges in the middle section of the oven. BE CAREFUL OVEN IS HOT. Use proper gear (glove/s) to protect your hand/s. Now switch on the oven with same settings at 230°C for 20 minutes.
Run for another 5 minutes should you want extra crisp.


Remove the container and allow it to cool before you transfer the contents to a serving bowl. Your tasty, healthy snack is ready.. serve it with tomato sauce/ketchup, better with the one that has chilli or imli chutney and enjoy your tea. The joy gets doubled when it is drizzling outside.
 

Today in the kitchen - Khumani/khubani ka meetha. Aug 04, 2021

This was on the anvil for a long time but finally things do happen when they have to happen. Khumani (appricot) ka meetha is a dessert that is not very common or even popular across the country.. like kheer, halwa, laddu, icecream etc. Only in some pockets like Hyderabad this is a must have dessert at weddings and similar festivities.

History suggests that when Zahir ud din Muhammad Babur came to india in 1526 and founded Mughal empire, with him came Khumani that was not a native fruit back then and Khumani ka meetha was only a royal dessert. Gradually, we started producing Khumani in mountainous Himalayan region and it became popular wherever royal influence was most.. so you find this dessert in Hyderabad, Kashmir and likewise. 

First time I had Khumani ka meetha was in Hyderabad some 30+ years back, at Country Club Begumpet Hyderabad and I remained a loyal fan but got an opportunity to have it only on rare occasions. I had planned to make this on my birthday to celebrate my newfound interest in the kitchen, but missed it by a day.. nevertheless, it finally happened.

So let's see what we need to make this unique Mughal Royal dessert.
Ingredients:

To serve 6 people (earlier times this was good for 3 only)

Dry Khumani - 300 gms
Water to soak - 500 ml
Powdered sugar -200 gms (I used only 100gms).
Optional: (I would avoid)
raspberry food colour (1/4 tsp)
Vanila essence - 4-5 drops

Process:
Soak dry appricot/Khumani for 12 hours(overnight) and remove the seeds. Take the fruit out and keep in another plate. Break the seeds on a silbatta/stone and remove the apricot's almond. Soak them again and peel to get the soft white almond. 
Take a pan and put the water you removed from soaked Khumani and put it on low flame, once water warms up mix the khumani and let the mixture boil for about 15 minutes. Now add powdered sugar and keep mixing till it dissolves and the mixture becomes a bit sticky, this would take another 10 minutes. Should you want, at this stage put the raspberry colour and the vanilla essence. Now shut the flame and allow the mixture to cool. Add the almonds you removed from the khumani seeds and put them on the top for garnish. Put the dish in chill tray of your fridge for another 15-20 minutes and you are ready to serve the delicious dessert. You could store it in the fridge for another week or more, if you want to have it later. 


Saturday, July 31, 2021

Today in the kitchen - mixed vegetable cutlet.

The idea of cutlets, an anytime snack, was not today's. I have been thinking of it for quite sometime. This could be made in multiple ways..some nutritious and tasty and some other more tasty and compromising a bit on by adding oily fats. I decided on the former.

This is also an all time savory. From breakfast to lunch to tea time to dinner time or anytime in berween. Cutlets are an almost no no during lunch and dinner in the north but in Western India especially in Gujarat and Maharashtra a "proper lunch" is incomplete without some savoury or other.. almost like how any meal must have a sweet dish across the country or anywhere for that matter as  with desserts.

I must thank Madhura's recipe from YouTube that I followed.

So let's fet going with the making of cutlets.

Proportions I took would make about six cutlets. Depending on your appetite and liking you (one person) could 2 or 3 cutlets in one go, so you adjust proportions depending on number of people and their taste and hunger level.

Ingredients:
Potato - 3 medium size (300 gms)
Capsicum - 1 medium size (50 gms)
Onion - 1 medium size (75 gms)
Green chili -2
Coriander leaves - 20 gms
Chat masala - 1/2 tsp
Garam masala - 1/2 tsp
Cumin powder - 1/2 tsp
Red chili powder - 1 tsp
Salt - to raste (1 tsp would be good)
White sandwich bread -4 slices
Maida - 1/2 cup (75 gms)
Corn flour - 1/4 cup (40 gms)

Preparation:
To make bread crumbs.
Take four slices of fresh bread and allow them to dry after taking out from the packing. We do not need very soft bread slices. Crush slices to small pieces and run it in a mixture grinder for about 10 seconds. Empty contents in a baking pan and bake in an oven for 2 minutes at 170°C (give heat from both sides). Take out, shake it (remember your container is hot) and put it again for another 2 minutes. It should be good to go but if you want even more crisp (I do) put it back in oven for 2 more minutes. Your crumbs are ready to go in cutlets.

For the cutlets:
Boil the potatoes in cooker with just 1 whistle, we need little hard potato. After you peel them mash them in small pieces (not fine) and put it in the freezer for 10 minutes).
Take a pan and add 2 tbsp oil. After oil gets heated add finely chopped onion and after 2 minutes add finely chopped capcium. Run the mixture on low flame for about 4 minutes, and SWITCH OFF THE FLAME. Now add mashed potatoes and all the spices (garam masala, chat masla, cumin powder, Red chilli powder, salt), finely cut green chillies and coriander leaves and about 4 tbsp baked bread crumbs. Mix all ingredients thoroughly and allow the mixture to cool. 
Now press the mixture with hand/s and make a ball of it, slowly press the ball and give it a shape of cutlet. Don't worry the crumbs will give it a good binding and it will not split. 

Now take a bowl and pour 1/2 cup maida and a quarter cup corn flour. You can skip corn flour and increase maida quantity if you don't have corn flour. I used maize flour (makke ka aata) instead. Add 1/2 tsp salt, mix well, add small quantities of water to make the mixture for coating cutlet, it should neither flow not should it be like a paste/gel.
Now dip the raw cutlet tikki in the mixture from all sides so that the liquid is uniformly spread over it, now place the cutlet over the crumbs so that it gets covered with crumbs from all sides.

You are now ready for the final steps. You could either deep fry these balls in oil or shallow fry or even bake them in an oven. I chose the middle path and shallow fried them. Take two or three tbsp oil in the same pan in which you made the mixture and when oil heats up (keep flame to low all the time) put cutlet balls in the pan. Fry both sides alternatively for 3 minutes each and a bit more if you think they are not crispy. Also pick up the cooked ball with a tong/ and roll the sides in the pan smoothly so that the sides also get cooked. (I have not seen any recipe that explains this step) check my video on Facebook post as Blog doesn't allow videos.

And... Your cutlets are ready. Try them with imli chutney and little curd. You won't regret and your guests would love them.

Thursday, July 29, 2021

Easy breakfast ideas - Oats Upma.

Nothing complicated, nothing extra ordinary about it, not even the first time preparation that I usually "brag" about😀😀😀.

 Actually, I want to help friends who are reluctant to enter into the kitchen even to fetch a glass of water.. yes, you.. you can also do it when you have no assisrance at home. So let's get going.

The quantity given is good for 2 people, if you making just for yourself or for the family or guests, reduce/raise the quantity accordingly.

Ingredients:
Oats 1cup/small bowl approx. 150gms. (I used Quakers, easily available, but there are many brands easily available, chose any)
Cooking oil - 2 tbsp I used olive oil
Turmeric powder - 1/2 tsp I used zizira from Meghalaya
Table Salt - 1/2 tsp
Curry leaves - about 12 leaves
Coriander leaves - 10 gms
Asafoetida - 1/8 tsp /small pinch
Mustard seeds - 1/4 tsp
Cumin seeds - 1/4 tsp
Red chili powder - 1/4 tsp
Raw mango powder - 1/2 tsp
Coriander powder - 1/2 tsp
Green chili - 2 medium size
Ginger - 1/2 inch piece/10 gms
Onion - 1 medium size/ 40-50 gms
Sugar - 1/2 tsp
Lemon to squeeze - 1/2 tsp
Resins/kishmish - 12-15/10 gms
Process.

Roast oats in a pan for about 3 minutes on a low flame. Add 1/4 tsp turmeric powder and 1/2 tsp salt and roast for another 3 minutes or till you start getting aroma from  the mixture. Shut the flame and remove the content in a bowl and keep it away to cool.

Use the same pan and add 2 tbsp oil and heat it on low flame for about a minute or till you see and smell the oil fumes. Add a pinch of asafoetida and mix it, add crushed green chili, ginger and curry leaves and run it for a minute/keep mixing. Now add onion and cook for about 5 minutes on low flame till onion changes its colour and becomes translucent. Add 1/4 tsp amchoor/Raw mango powder, 1/4 tsp Red chili powder and 1/2 tsp sugar and mix for another minute. Now add the roasted oats to the mixture and keep running it till all ingredients are homogeneously mixed. Ensure that the flame is low to medium low all the time. Now add 1/4 cup about 50 ml  warm water and mix it thoroughly, mixture would still be dry, now add another 1/4 cup of warm water and mix well.. water mixing should be done in small quantities and gradually so that the mixture doesn't become lumpy or running. Cook for another 5 minutes and add coriander leaves and resins, squeeze the lemon and mix for another minute and switch off the flame.

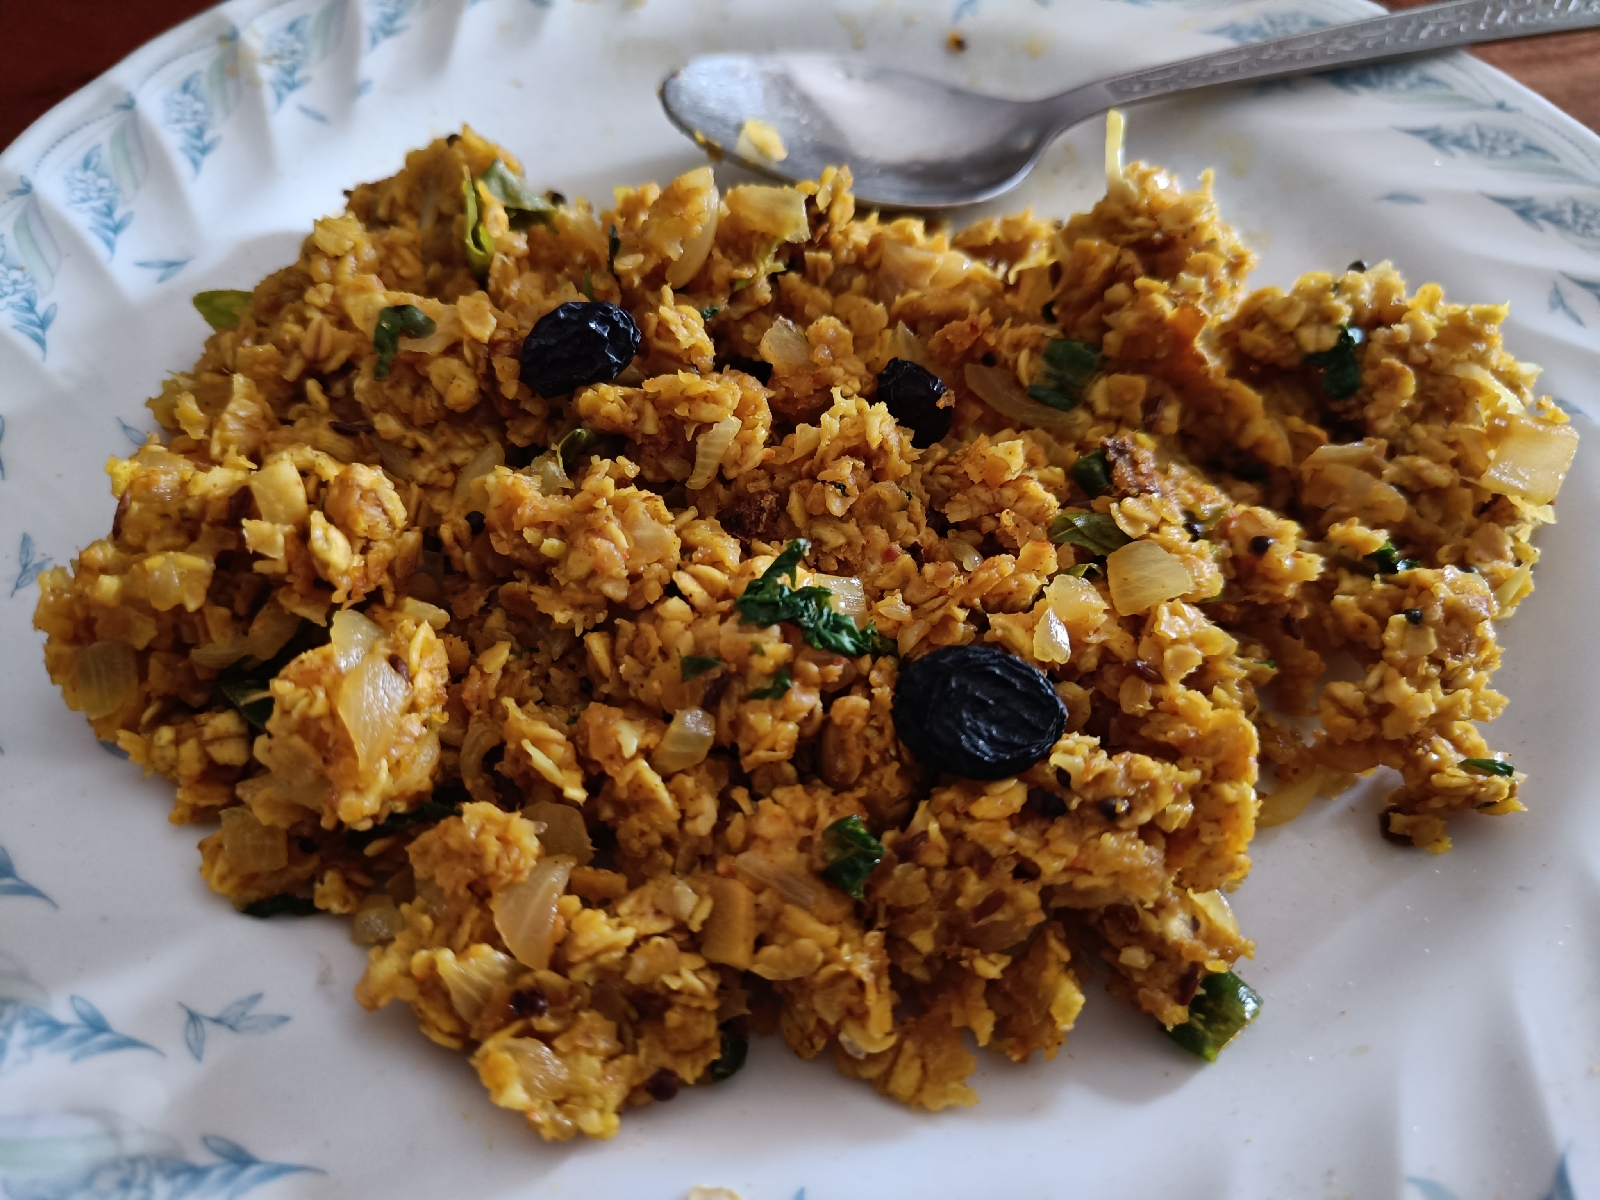
Your nutricious, tasty breakfast that looks appealling and appetizing is ready. Take it in a plate. If you are from Indore, you may want to spray some long senv over it. If from South or West or from whichever other place use any popular noodle senv or masala boondi. Bring a cup of tea and you are set on the breakfast table. Should you have Alexa nearby just ask her to play your favourite music and your day is made.


Wednesday, June 23, 2021

Today in the kitchen - pollo cremoso all'aglio con pasta (June 23, 2021)

Simply put, creamy garlic chicken with pasta, but when the outcome looked and tasted Italian, why not call it in their language. I had no idea as what will I cook but when I was given two chicken breast pieces and asked to cook, I felt as if I am in the Master Chef Australia's entrance test when you don't know what will you be asked to cook and how. First suggestion was chicken salad and pasta but noticed that salad essentials ( vegetables like lettuce, pepper, mushroom etc.) were not available. So my search finished at Creamy Garlic Chicken recipe that was looking simple and appetising. I liked the simplicity and humility in instructions in the channel called "Break the Spice".. whatever that means.

Looking at the pictures it appeared like a continental specialty but no where in the video it was described as such. But watching the video I could smell and taste the dish, that reminded me of our various lunches and dinners we had a couple of years ago in a restaurant outside Pallazo Vecchio in Florence, Italy. 

so, let's begin, this preparation will serve two so you can adjust quantities proportionately, it appeared a very simple dish and you would sure enjoying cooking this.. with little ingredients and here they are:

that's it.

a) two chicken breast pieces - approx 300 gms.
b) 1 medium size onion -about 100 gms
c) 7garlic cloves medium size - 25 gms
d) 1 small size lemon or 1tsp lemon juice
e) 3 tbsp cooking oil (I used olive oil)
f) 2 tbsp salted butter (amul)
g) 1/2 cup cream - 75 ml 
h) 1/2 tsp - freshly ground black pepper
i) 1 tsp - oregano
j) 1tsp - parsley
k) 1/2 tsp salt 
l) 1/2 tsp nutmeg powder.

Preparation:

a) sprinkle some black pepper powder and little salt over the breast pieces and leave it for half an hour.
b) finely chop a medium size onion.
c) crush 2 garlic cloves and finely chop the rest.

cooking process:
While the chicken is getting marinated finely chop 1 medium size onion and 5 garlic cloves.
Keep flame to low to medium, all the time.

Put a frying pan and when heated add 3 tbsp oil and the chunk (1 tbsp) of amul butter.,
Put two crushed garlic cloves and run it for about 30 sec.
Add the marinated chicken pieces to the pan and keep rotating/tossing them every three minutes till it is cooked. Use a tong and cook the chicken sides too, since the pieces are usually thick the sides don't get cooked properly until you do this.


after the chicken is cooked take it out to another dish for later. This will take about 8-10 minutes. Remove the crushed garlic cloves. Add another chunk/tbsp of butter and let it melt, now add  the chopped onion and cook it till it becomes translucent, this will take about 5 minutes. Add the chopped garlic and cook for another 15-20 seconds. Now add 1/2 cup chicken stock or plain water and add a tiny piece of chicken, if you have any left (don't worry if it is not there). Squeeze one full medium size lemon and let it come to boil. Now add the oregano and parsley dried powder a tsp each and mix and cook for another 2-3 minutes. Now add 1/2 cup cream to this and wash the cream container with some water (1/4cup) to use cream stuck to the sides of the container. Let everything boil for another 2 minutes. Now add the cooked/fried breast pieces and cook the whole mixture for another 5 minutes. Keep pouring the liquid over the breast pieces since it doesn't get dipped into the creamy mixture completely. Keep turning the pieces. 

Take the content out into a serving bowl.


Your "pollo cremoso all'aglio con" that is creamy garlic chicken is ready .. the aroma certainly has an oomph factor to make your evening romantic. Serve it with the pasta salad that I made same way as I had a couple of weeks back. ( Jamun in the plate improves the visual and also adds variety in taste. This is on my own, not part of the recipe :))


Sunday, June 20, 2021

Today in the kitchen - Samosa (June 19, 2021).

Samosa, more than the kachoris is a weakness of all foodie Indians. This is one unifying factor of the country more than any other single item.. language, caste, religion and what you have. From east to west and from north to south you will find samosas in small eateries and also in a five star hotel and price will range from Rs 5.00 per piece to Rs 1000 per plate of two. Suggesting its popularity from peasants to rich and super rich. Although there are various different filling but aloo(potato) is a de facto standard, if you look for an alternate some hard core non-vegetarians also prefer aloo over the filling of keema.

Samosa is also an every time food.. breakfast, between breakfast and lunch, between lunch and tea, at tea and sometimes even in lunch and dinner if you are at a party or in a restaurant.. like a small size samosa is a delicious part of a Gujarati thali at lunch and dinner. Then there are dry samosa that are shaped as pyramid like the original samosa but filled with daal and could be eaten like savories and stored for a longer time, however, I would call them poor imitations, it doesn't give the satisfaction of the real fresh aloo Samosa. While growing up in and around Indore although the standard breakfast was Poha but if you want complete breakfast and can afford a few bucks more you would certainly add one samosa and sometimes even two or three jalebis, any time of the year. That's not unique only to Malwa/Indore but I can sincerely talk and endorse this habit from the region.

Although born and grown with the Malwa Samosas were never made at home, since every nook and corner of every village or a city mohalla had it readily available, no one made it at home. Samosa is also an item without which a party or wedding meal is incomplete. I always use to fancy the process and it always looked complicated to me, in any case I got interested in making a little "complicated" dishes only after the advent of YouTube and more so during the "house arrest" that I have been enjoying since past 15 months. Been thinking of getting my hands on making this ubiquitous Star food item that is my favourite and before the last 15 months no stroll or outing to the market was complete without eating Samosa more so when I was with friends like Dinesh. In Indore also whenever we visit home samosa was often included in breakfast alternating with tea times. 

So when I checked on recipes there were aplenty showing the interest of chefs as well as budding experimental chefs like me/YouTube viewers. I looked at four different ones whose channels I often see and picked up a mix between Nishamadhulika and PapaMummy ki Rasoi. So let's see how I proceeded (and succeeded :). 

First the ingredients, it's easy and everything needed is usually home.

For 8 normal size Samosa.

For the covering:
Maida -250 gm
Common Salt - 1 tsp
Ajwain/ carom seeds -1tsp
Pure ghee - 3 tbsp
Water - 80ml or 3/4 th cup.

for the filling:
potato - 4 medium size (250 gm)
Green peas - 50 gm (I didn't have)
Coriander full - 2 tsp
Saunf/fennel seeds - 2 tsp
Ginger - 1" ( approx 20 gm)
Green chili : 1 or 2 
depending on your taste and size of chili
Green coriander - 20 gm
Cashew - 20 gm
Resins - 20 gm
Coriander powder - 1 tbsp
Red chili - 1/2 tsp
Garam or chat masala - 1/2 tsp
Black salt - 1 tsp
Cumin powder - 1/2 tsp
Turmeric powder 1/2 tsp
Amchoor/dried mango powder -1/4 tsp
Oil - 3 tbsp

For frying samosa:
As much as required to immerse fully. For a normal size kadhai/saucepan you may need about 350-400 ml although less than 100 ml will get used.


Process:

For dough:
Take maida into a large bowl, add 1tsp salt, crush 1 tsp Ajwain in your palm and add to this. Now add liquified(room temp) 3 tbsp pure ghee and mix the contents thoroughly using both hands so that it is homogeneous. Now add less than 1/2 cup water and start kneading, add very little water quantity lest you add more and it starts flowing, we need hard/tough dough, not like the one used in roti or naan or kachori. Cover it with a wet cloth and keep away for 1/2 hour .

For filling/stuffing:

Boil the potato and allow them to cool. If you are using a pressure cooker than five three whistle and don't take out steam. Open the cooker after about 10 mins. Let it cool or dip them in cold water for 5 minutes. ( In most recipe I noticed they assume that you have boiled potato ready.) Peel them and mash them with hands into big chunks.

Take a silbatta/stone and crush 1tsp each of coriander seeds and fennel/saunf seeds, little coarse.
Also crush green chili and ginger to a paste.


Take a flat pan, put it on a low/medium flame, heat it and add 3 tbsp oil. When oil show some fumes add cumin seeds and when that starts to crackle, add ginger-green chili paste and sauté for a minute, add crushed coriander/fennel seeds and sauté for another minute, now add rest of the spices.. red chili, garam masala, amchoor/dried mango powder,  dhania/coriander powder, black salt, stir and sauté for another two minutes. Now add pieces of cashew nut (cut one nut into 4 small pieces) sauté for another minute and add mashed potato chunks ( don't mash them fine. Add coriander leaves. Add turmeric powder and sauté for 3 more minutes so that the whole filling mixture looks homogeneous, add resins and mix again for a minute. Switch off the flame, take out contents in another bowl and allow the mixture to cool.
Take the dough and work on it again for about two minutes. Roll is and make 4 balls out of it, while making the balls keep rolling them between your palms for a minute or so to smoothen the ball. Now flatten it between your palm and using a rolling pin, roll it into an oval shape, make sure it has uniform thickness in the edges and center. Do this for all the balls. As far a possible make all balls and flattened covering of the same size. Now cut ( the covering/roti) it into half and keep aside.
Now is the trickier part. Take the covering/roti and apply water on the surface that is a straight line (not the curved surface) and fold it to make a cone and press gently so that it gets sealed at the joint. Now add filling and give another fold to the opposite side on joint and seal the samosa gently from the top. Following picture shows the process but you must use some video to understand, if it is not clear.
 (above picture is taken from internet as I couldn't click with both hands occupied :))

After filling all the uncooked samosa cover it with a wet cloth and wait for another 10 minutes.

Now to fry samosa, take a kadhai/deep frying pan and pour the oil, put it on a low to medium flame and when the oil is heated (check by putting a small piece of dough or cumin seed) put the uncooked samosa one by one.. ensure they are not on the top of another. Keep the flame low of medium and don't touch anything for the next 5 minutes, now turn them and let the other side cook for another 3-4 minutes until the samosa becomes golden brown. Like in the picture.

Now take them out and let the oil drain back into kadhai. Turn off the flame and wait for five minutes to let the oil cool down. Reignite the flame to low or medium and after the oil is heated up, add the rest of the samosa and let it fry for another 5 minutes without turning, them turn and let it be there till you see a perfect golden brown colour.

Remove let it cool a bit and serve with imli/tamarind chutney and green coriander/mint chutney. Aroma of Darjeeling leaf tea will be irresistible with the hot samosa especially at even tea. I was lucky to have a cool and cloudy weather even in mid June.. just perfect to Samosa-Chai.

To avoid bubbles over the surface - ensure that you leave the dough is rested to relax the gluten and the air leaves the dough. Allow the oil to cook between the frying lots.

To avoid the cracks - Use water generously to seal the covering and press gently so that it doesn't crack. The fold on the top opposite the joint is important, you need to master that in order to get a perfect shape.